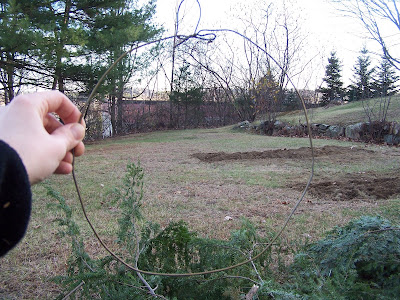
Friday, December 10, 2010
This Moment
{this moment} - A Friday ritual. A single photo - no words - capturing a moment from the week. A simple, special, extraordinary moment. A moment I want to pause, savor and remember. If you're inspired to do the same, leave a link to your 'moment' in the comments for all to find and see.
Tuesday, December 7, 2010
How to Make Salt Dough Ornaments
Salt dough ornaments are at the heart of creative handmade christmas tree ornaments. Its a craft that has been enjoyed by little hands for decades. For me...only two decades...but even so...it still is a wonderful holiday tradition steeped with memories and treasured times. Our salt dough ornament adventure was several days in the making. Depending on the current vibes in the house we're not always ready to bring out the paint! Everything came together this morning though, and although the little man looked like a painted salt dough ornament himself by the time we were done, it was, again, one of the many treasured moments of this holiday season.
There are countless sources for salt dough recipes available, it's no secret, but since you're already here, I'll share my recipe and process with you!
Salt Dough
2 cups all purpose flour
1 cup salt
~1 cup water
1. Mix the salt and flour together in a bowl.
2. Mix in about 1/2 cup flour, then add the rest a little at a time until the dough is the desired consistency.
3. Roll out the dough to ~ 1/4-1/2" thickness and cut out with cookie cutters, or form into desired shapes as though playdough. Poke a hole in each ornament with something...! I used the head of a finishing nail that happened to be in my pocket while we were making these, but any small round pointy thing will work!
4. Place on a cooling rack and allow to dry or encourage to dry by placing the ornaments on a cookie sheet in the oven at 200 degrees for 10-15 minutes.
5. When dry paint away!
6. Coat with clear coat, or varnish to seal the ornament and help it to last through the years.
Hang them on the tree, tie one to a gift, bundle a few together as a gift...and enjoy your handmade holiday season.
Posted by
Hannah
at
12/07/2010 01:41:00 PM
How to Make Salt Dough Ornaments
2010-12-07T13:41:00-05:00
Hannah
Comments
Monday, December 6, 2010
Christmas Adventures
This weekend we bundled up the kiddos, packed enough stuff to last an entire weekend I am sure!, and drove on route 2 for a little christmas adventure. It was wonderful. In the Berkshire Mountains in a snug little hollow that is deeply familiar is a little town that I used to call home. And there, on the first Saturday in December, is a holiday bazaar with more home-town goodness, artisan crafts, and true holiday simplicity than can be found anywhere in the world. There is truly nothing like a small town holiday bazaar. My little girl was completely inspired by the hand-made jewelry and fancy headbands...there are big plans for our own creations happening. But oh, the fun they had decorating cookies with the greatest variety of sweets they had ever seen! Oh the many many joys of Christmas.
Not too far down the road from there, oh so close to the magical historic Deerfield is Yankee Candle. Such a drastic difference from the home-town simplicity of a home town bazaar, but still a whole lot of fun. And a whole lot of people! Yikes. By far, oh, by far, our favorite spot at Yankee Candle was the candle dipping stations. Rows and rows of white tapered candles, and wax ornaments hung beside station after station of colored hot wax. Each station was set up neatly with simple instructions that made this activity so much fun and easy to figure out for novices like us (even with the buzz of crowds of people surrounding us). The littles had so much fun. The worked independently for the most part (we helped keep the second taper out of the way...and the little guys hands out of the hot wax!) and were so pleased with their creations. What started out as one turn quickly turned into candle after candle. It's kind of amusing that in the huge commercial Christmas wonderland that is Yankee Candle, our little family finds, and has the most fun with the one handmade activity available!!
Posted by
Hannah
at
12/06/2010 11:13:00 AM
Christmas Adventures
2010-12-06T11:13:00-05:00
Hannah
Comments
Saturday, December 4, 2010
How to Make a Christmas Tree Skirt
60" inch wide fabric ... enough to make a full 60" square.
~1/2 yard fabric for binding.
A bit of ribbon.
Yup...that's it!
1. Lay out your fabric on a flat surface...like the floor!...and fold it in half, then in half again. cut off the corner into a rounded shape and open it up. You should have a circle. It might need some adjusting...mine did! If you have a giant hula-hoop that might help the process.
2. In the center of your circle trace a 8" - 10" circle and cut it out.
3. Determine what will be the front of your skirt edge of your skirt. On the back of the skirt cut a straight line from the middle circle to the outside edge.
4. Prepare your binding (which must be cut on the binding) and attach it to the outside edge of the skirt, to the inside circle, and to the straight edges.
5. Attach ribbons on the straight edges to tie the sides together when on the tree.
And now you're done!!!
See I told you this was the simplest thing ever. There are much more elegant ways to construct a tree skirt I am sure...but I just needed to create something...and simple and quick was what I needed!
Wishing you a wonderful weekend surrounding your own tree.
Posted by
Hannah
at
12/04/2010 08:05:00 AM
How to Make a Christmas Tree Skirt
2010-12-04T08:05:00-05:00
Hannah
Comments
Friday, December 3, 2010
These Moments
...created all sorts of things, and enjoyed the peace that a napping two-year old brings to a home.
Not much has changed. Each afternoon we three little Robinsons find ourselves snuggled into the fleece sheets on my bed with a massive stack of books. Each afternoon it is a bit of a struggle to fight off the dozes myself, but when that little blonde head becomes heavy with sleep and his (all of a sudden huge) body slumps against me, my own home, 23 years late,r is filled with the restful peace that a read-to-sleep napping bundle brings. No, not much has changed.
Tuesday, November 30, 2010
How to Make Holiday Wreaths
In the midst of the magic of holiday preparations one activity at the very tip-top of my list is wreath-making. Pruning and gleaning from the trees in our yard, gathering armfuls of scented branches, snipping and bundling, wrapping and tying, and sticky, pricked little fingers...oh yes I love it all!
The first wreaths made it out of here destined for the doors of two of my favorite ladies just in time for Thanksgiving. My fingers have been positively itching to be making more for our own home. It's actually quite simple. Honest. I wish I could gather you around my picnic blanket filled with greens and spend the afternoon making wreaths, chatting, and basking in the season together. Alas...you are there and I am here. So today I bring you the simplest wreath instructions ever. No special tools or techniques....just easy peasy wreaths!
To be totally and brutally honest I have no idea where the wreath form that I carefully packed to make sure I had it ready for the holidays. I couldn't stop from making wreaths without my form though...so I improvised! So here we go...
How to make a wreath...as simple as it gets.
Materials:
~Bits of greenery. (I gleaned branches from the several different types of evergreens on our property. I love a variety of greens in my wreaths, but all of the same variety is very beautiful also.)
~Garden Snips.
~Your very least favorite, but sturdy, yarn. Cheap acrylic is great...easy to come by and tough to break.
~Wire coat hanger.
1. Start by gathering your greens and snipping them into small sprigs (~6" long). I like to have mine sorted into piles by variety...but a big jumble works too.
2. Bend your wire coat hanger into a circle, twisting the hook so it doesn't stick up quite so high and makes a good loop for hanging your wreath.
3. Gather a little bundle of greens. It's very difficult to tell you how many you'll need. You'll really just need to test it out and see what you like. Imagine your bundle as a small segment of wreath and decide if you like how wide and full it is. Increase or decrease your bundle as needed.
4. Snip a ~24" piece of yarn and tie one end to the hook on your wreath frame. Place your bundle on the frame and wrap your yarn tightly around it. Not so tight that you're breaking the sprigs, or the yarn, but tight! Tie off the yarn but don't cut it.
5. Gather another bundle of greens and place it on the wreath form so that it overlaps the first bundle. Again, you'll have to decide how much you want it to overlap. You will, of course, want the yarn to be completely covered. The more that the bundles overlap the fuller your wreath will be...the more greens you will need too!
6. Once your bundle is in the right placement for your tastes use the yarn you wrapped the fist bundle with ant wrap it tightly, with the same method you used on the first.
7. Can you see your wreath taking form...kind of...! Repeat these same steps over and over again until the wreath is completely filled in, adding more yarn as needed. The last bundle you will simply tuck under your first bundle.
And ta-da!!!! You've made a wreath. You can embellish to your hearts content with pine cones, ribbons, and all sorts of holiday bits and bobs.
If she could have her way every embellishment imaginable would adorn every wreath!!
Happy wreath making friends!
Posted by
Hannah
at
11/30/2010 07:53:00 PM
How to Make Holiday Wreaths
2010-11-30T19:53:00-05:00
Hannah
Comments
Monday, November 29, 2010
Cacooning
Recently, while drinking in all the design genius on Bloesom Kids, I caught someone referring to the holidays as a time of caccooning for a family. It was literally just a few words, and I have no idea in the world who said them, but those few words have filled my mind this weekend. Their simple truth resonated in all we did. It truly was a caccoon of a weekend. Filled with gratitude, family, friends, all the good things of the earth, and the beginnings of a season of merry-making.
The simple warmth and glow of the season, the same warmth and coziness of a caccoon, was tangible this weekend as a tree made it's way into our living room, the christmas workshop officially opened for daytime hours, and the first smells, sounds, and busyness of the holidays began.
Slow down, breathe it in, and enjoy the cacoon that envelops your family this season. Oh it is a beautiful thing!
Subscribe to:
Posts (Atom)