Showing posts with label woodworking. Show all posts

Saturday, August 21, 2010

China Cabinet Refinish

The sweet little thrifting fairies have been very very good to me lately. Somehow they caught on to the new musings and dreams in the project sector of my brain centered on remaking tired old furniture into something truly amazing. (So easy to make something truly amazing in ones brain isn’t it!) My infection with the itch to get my hands on some great furniture pieces has been largely fueled by this blog that my sister introduced me to. My daughter and I have great fun looking through the project before and afters and I find myself very inspired. I do have to admit that there are times when we prefer the “before”!

The first piece that entered my life (for the dazzling price of … free!) was a dated china cabinet with damage from being stored in a hot humid garage. As with all furniture redo's not all pieces are created equal. In terms of wooden pieces such as this there is little use putting time and effort into remaking a poorly made piece. Particle board…MDF…wibbly wobbly construction…not worth it. Look for solid wood pieces with strong joints. Aside from considering construction and materials the next challenge is to look at the piece for its lines and shapes and forget whatever unpleasing finish is currently on it. This is trick as some finishes are quite distracting in their hideousness…yikes!!

In terms of this cabinet I knew several things right away. I knew it was a well built solid wood piece despite the peeling veneer and and broken hardware. I knew I wanted it as a dresser and not a china cabinet. I knew the lines were good…despite the dated treatments. I knew the glass was more of a canvas than window…the only question was what to put on that canvas. I knew it needed to be mine! 105_7168

I started by getting rid of the molding at the top of the cabinet and removing all the loose veneer. I sanded the entire piece and spray painted. I was very pleased with the quality of finish the spray painting produced. It was my first time spray painting anything. There were serious doubts from the peanut gallery on whether it would turn out well…! Choosing hardware turns out to be just as much fun as choosing buttons. I highly suggest little children for this activity. It is so much fun to see what they love and are drawn to…and all those little handles to try out! Yikes! We do love hardware store trips.

With new paint and hardware the only thing left to do was create some kind of finish on the glass. Because I was planning to use the cabinet as a clothes dresser I wanted some opaqueness to the glass…but not all opaque. After way to much deliberation I decided on a graphic floral design and bold stripes. This was by far the most tedious and time consuming part of the project. But I love it….so it’s easy to forget about the work involved! I covered the glass with contact paper and traced my design onto it. 107_0102

Then…little by little…bit by bit…I cut away the pieces with an exacto knife.107_0101 107_0103

After the pieces that I wanted to be opaque-ish were cut away I used a frosting finish for glass and sprayed several even coats. Then the best part…peeling off the contact paper and revealing the finished design. 109_0004 109_0006

I am sooo happy with how it came out! It’s fresh and modern and just the look I was going for. I love using it and am so excited to finish more pieces.

BEFORE

105_7168

AFTER

109_0006

Monday, August 2, 2010

Dance

I’ve shared with you before how much my little girl loves to dance.  She loves to dance.  All day everyday she dances from room to room, often wearing a tutu, leotard, or dress she deems twirly enough!  It is simply a part of her!  In fact, at this very moment she is dancing and flitting around from room to room in a purple leotard gathering toys.  It’s unlikely she will take it off…or stop dancing…before bedtime! 

Recently I decided I wanted to document more of my children’s loves and current interests with artwork created by me.  This serves two purposes.  It creates a beautiful representation of where they are in this phase of their lives, and also offers me yet another chance to create.  I completed a zebra for my son recently and have only to hang a new piece for my dancing girl! 

105_7161

I used a piece of salvaged wood and stenciled three dancers, and wrote the word “dance”.  I used a staple gun to attach scraps of fabric and “gauzy” bits to create their skirts.  Yup…that’s it!  Easy peasy!  Now the only challenge lies in finding the perfect spot to hang it that also lines up with a wall stud…!  I’m probably being overly cautious…but I don’t want to take any chances with it falling down! 

 105_7155105_7158105_7159105_7165105_7164105_7162

Happy Monday friends!  Granola is in the oven…bread is started…the kidlings are playing beautifully…it’s going to be a great week! 

Monday, July 26, 2010

The 15 minute Remake…and a Very Important Question!!!

I was given this fantastic little box recently by my mother.  We both knew the painting on the top was…hmm…not my style!!!  But we both also knew that it would not take much to turn it into something truly great…and that I would love doing it! 

Lots of fantastic ideas of how to refinish the top came to surface in my busy little brain but in the end I went with the quick and easy and let Amy Butler do most of the work!!  In less than 15 minutes (literally!!!) I sanded the sides to remove some of the paint…cut a beautiful Amy Butler paper to size, glued it on, and applied clear varnish to seal it.  I love it!  Now what to put in it…! 

105_7077105_7137105_7139105_7143105_7144105_7147105_7150Do you like the new look!  And that dill…yum!         

So…on to the very important question! 

We are looking for a new “just right” read-aloud chapter book for the little miss.  I would love to hear what some of your family favorites are!! 

Friday, June 18, 2010

Swings

In between a whole lot of this

June 109

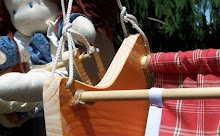
we managed to find a bit of time to spend in the workshop recently.  Those poor tools…they’ve been quite depressed with the lack of company and appreciation.  And with all the sewing that’s been happening around here lately it was nice to change mediums for a bit.  Although the project did require some sewing too…! 

The littles have been dealing with a bit of a conundrum regarding the swings.  They love to swing…and love to play with their dolls and animal friends and give them turns with the swing.  But how to swing themselves and give the dolls a turn…?!?!  While this challenge was being discussed with emphatic hand gestures (oh my!) I came up with a simple little design for a doll swing that I thought I could pull off.  It turned out just as I hoped and everyone is very pleased to say the least.  The pattern is remarkably simple and it was quite easy to put together…even with four extra little hands and a constant stream of curious questions. 

We made two swings…because sometimes making two of something is just as easy as making one…and sometimes having two of something is much easier than having one! 

June 022  June 027 June 033 June 034 June 035  

I do so love to put some creative energy to use to inspire and bring joy to my children.

Thursday, April 15, 2010

A Find

I’m always on the look out for certain things on my thrifting adventures.  Not necessarily current needs…but things I always can use and just love to surround myself with.  Wooden crates are a constant on that list!  I have several wooden apple crates that we love to use to store a rotating inventory of things.  A large box that once held a cheese round (and has been sufficiently aired out!!!) is one of my favorite finds.  Recently we happened upon a wooden crate…a shiny gold wooden crate!  April 052My daughter loved it gold…but it wasn’t quite the look I was going for and was sure a bit of sanding would bring back it’s original glory.  I was pleasantly surprised at how easily the gold sanded off (I used an orbital sander and 80 grit paper) and am thrilled with the result!  Now what to put in it…I already have so many perfect purposes for it…hmmm! 

April 089   April 088

I do love a good find!  Had any lately?!?

Friday, April 9, 2010

Making Things

April 066Someone asked me yesterday the classic question…one that we’ve all heard countless times, “what do you do?”! Well…I know what I am…I am a mother, a wife, a daughter, a sister, a friend. But what do I do? I studied a certain thing (with many tangents I’ll admit) in school, I have particular work experiences, but what do I do? As I thought more about this today while I was outside with the kidlings it came to me…I make things. I create. All sorts of things! And I love it. I am a mother. I make things. I think I’m going to hope on TurboTax right now and change my occupation…no more Homemaker…enter Mother. Maker of Things! (I realize I just admitted that those taxes (which are done) aren’t actually filed yet…I make things…but I’m not perfect!)

I am an artist. You might think that that is a simpler reply that “maker of things”….but then some of the things I make are, well,…just things…but oh do they bring me joy!April 062

This thing has been my latest project and is part of the children’s garden that we have been creating this spring. It is a very special project for me and we are having so much fun working on it together and have such dreams for it! April 058 April 061

Perhaps you have made a tipi for your pole beans to grow on. This is essentially the same thing. We (my husband and big strong nephews were a huge part of that we) cut saplings and put them into the ground (8-10” down) and tied them together tightly at the top. I tied smaller branches around the structure to create “walls” before the beans are climbing up. The little gardeners are very happy with it.

Yes…I make things and find so much fulfillment in doing so.

What do you do?

Wednesday, February 10, 2010

Toys to Love

Do you mind if I take a moment to tell just how good it feels to make toys for my children that inspire free, creative, imaginative play.  It is a beautiful thing.  I highly recommend it. 

The castle has seen some serious playtime the past few days.  The location changes, the story changes, the players change, sometimes they’re not in pajamas even!  But it is always so good to see. 

Have a wonderful day of creative play.  It is the best way to learn after all! 

January 114 January 093January 095January 115    January 099 January 113

Saturday, January 9, 2010

Montessori Color Spools

With the holidays behind us I am refocused on working through the list of Montessori materials I would like to make. My most recent project was Montessori Colored Spools.

105_4586

I have been gathering a lot of information about Montessori homeschooling lately. So much that I have gotten a bit overwhelmed and needed to pare back, organize, and really assess our needs. A huge part of the Montessori method is in fact observing and taking cues from the child. In doing this I saw a definite opening for color theory and art principles to be taught. I found some great resources at Beautiful Sun Montessori that I am excited to use.

105_4569

Basically we’ll work with the color spools and differentiate hue and strength. Then we’ll introduce the color wheel with the spools, then work with eye droppers, food coloring and water to mix and create colors, (all the while doing lots of painting to let her mix her own colors and create with them), and finally (I’m super excited about this) she will make vanilla pudding (from scratch over the stove…!) and die small bowls of it with food coloring to create a pudding “color wheel”. Yummy…and such a sensory bombardment!!

So here is our color spool project:

We had a blast gathering paint chips that represented true hues in six shades. (I am thinking of leaving off the lightest shade as they are a bit tricky to differentiate…so we may just end up with five shades.) I bought lattice strips and cut them into 3” segments. (Final dimensions: 1 1/2” x 3”).

105_4560

I cut the paint chips into strips, all the while thinking of so many fun cards and projects that you could make with these lovely striped bits of colored goodness! Yes…I have an unnatural love of paint chips!!! I think some crafting experimenting is in order. But back to the color spools…! The colors were glued to the wooden pieces and modpodged and varnished.

Oh, is it good to see her little hands so involved with momma made wooden bits of beauty. She is delighted and absorbed by them and we are very excited to explore color together. I have to say, while we were taking these pictures her little brother reached up and somehow got a handful of the spools. Absolute glee would be the only words to describe his reaction to his conquest! So I think it is safe to say that we are all excited about these bits of color!!

105_4570

105_4573

If you plan on making these please feel free to contact me with any questions! I am always happy to help in any way I can. Why make your own mistakes if you can learn from mine, right?!?!

Wednesday, January 6, 2010

Holiday Handmades :: Sewing Cards

I stumbled across stumbled across a free download of vintage sewing cards a few months ago and they went immediately into my “projects I must make” list (it’s a large and ever-evolving list that I love).  I fell in love with the images and had been looking for something perfect to make into a set of wooden cards for my daughter.  They went together quite well with only a few hitches...!  (“only a few” is pretty good in my book!!!)  I cut 5” x 7” cards out of 1/4” plywood and sanded them carefully.  I used modpodge to adhere the images to the boards and a had a bit of trouble with air bubbles which I am assuming came from slight irregularities in the wood surface.  Even carefully sanded wood has pores to hold air…I think to avoid this in the future I would give the surface one coat of modpodge…allow it to dry and then carefully adhere the image over it. 

105_4521

The second hitch came when I applied modpodge over the image…it caused the printed ink to run a bit…which just makes it look vintage and aged…which is fine with me…but it was tricky to work with.  I’m really not sure how to avoid that problem again.  Despite any hitches we are thrilled with cards. 105_4519 She really has been enjoying working with them and making their dresses “even more beautiful”!!!  We have incorporated these right into our schooling days as they are excellent for fine motor development, the beginnings of handwork, coordination, and patience to name a few!!!  Besides…they are just darling!!

While I was making them I had two extra boards…and the idea for a project for her cousins was born.  I noticed (with pleasure) that she was so thrilled to be making something for them, and so focused on choosing just the right papers, and making something each of them would like, that she never asked for one for herself.  I really valued seeing her thinking so outside of herself.  It also saved me the trouble of deflecting the issue!   105_4520 The little girl on the top card “holds” all the string in her hands! 

Monday, January 4, 2010

The Village

While I was growing up I (along with  my brothers and sisters) spent quite a bit of time puttering about the workshop while my Dad was building this or that.  He made bunk beds, dining room table benches, bookshelves, tables, kitchen cabinets, toys, etc.…and we made blocks from the scraps that fell from the table saw, mini forts and tunnels in the piles of sawdust, hammered huge nails into scrap bits of wood to join them together into who-knows-what!  And just spent time with our Dad and learned to love wood in all its possibilities as he learned to love it from my Grandpa.  It really was a huge part of our childhood, a legacy in fact,  as each of us still works with wood in our own ways.  Two of my brothers built a home from scratch using a First Day Cottage kit, my other brother among many other woodworking adventures spent time restoring historic wooden carousels, and my sisters make and restore small furniture and make items to beautify their homes,…and me…well, you never quite know what I’ll be making or doing next in the shop! 

105_4522

While I was in the workshop with my Dad during one of those cozy woodworking afternoons of my childhood I gathered several pieces of scrap wood from what he was cutting. To me they were not just scraps of wood, they looked just like little houses and trees…so that is what they became for me. 

105_4527

When my Dad saw what I was doing he cut some pieces specifically for me.  I found my markers and decorated them and played and played.  That little village was one of my very first woodworking projects and became one of my parents most treasured Christmas decorations. 

105_4528

This year…my own little girl worked with her own amazing Dad and gathered, cut, sanded (this is where the belt sander came in!!), designed, and decorated a village for me.  Along with houses and trees she made a church and a temple, and a few bridges.  It immediately became one of my most treasured possessions. It’s pieces stand on the window frame over two of the windows in my bedroom and bring me such joy each time I see them.  105_4531 105_4532  105_4534   

Yes Dad, it was a legacy indeed.  Thank you.