Showing posts with label thrifting. Show all posts

Monday, March 28, 2011

Clock: Before and After

My little one is beginning to tell time in a serious way.  As this new phase emerged suddenly one morning, we realized that there isn’t a “normal” clock in our home…anywhere.  Digital clocks just weren’t going to cut it.  I picked up a simple clock while thrifting for basically nothing.  The only problem was that it was disgustingly mauve.  Ick.  Not a problem a little modpodge, fabric, and paint couldn’t fix though!

IMG_8634

I took it apart and painted the face white.  I had planned to go over the numbers with a different color but ended up really liking it all white.  Because the numbers are raised they are still very easy to read…which after all is the whole point!!!  I “mod-podged” fabric around the edges, put it all back together, and viola…a non-mauve clock for a very mauve price!  What better way to start the week than a good before and after!  (An after lunch trip to the hardware store for supplies for another project is also a great thing to look forward to on a Monday…makes all the “weekend-recovery” cleaning worth it!!!)IMG_8635IMG_8638IMG_8637

Happy Monday friends.

Monday, January 3, 2011

A Bit More Apron Love

A few weeks ago I received a bin of simply delicious vintage cottons.  There are bits of magic hidden in the closets of decades old sewers and oh the joy when they overflow into my own closet!  Tucked away in the stacks of fabric were two rather plain, but completed, aprons.  The littles latched onto them immediately and despite their adult sizes declared them simply perfect.  I have to admit, their “completed” status was rather attractive as the unpacking and holiday preparations stared me in the face.  With a few gathers and tucks we now have two appropriately sized aprons that have been getting a lot of use.  After all holiday baking has to happen despite the size of any other to-do list right!!! 

Here’s how the alterations went for Rebecca’s apron. Basically I gathered the top edge, the center front, and the sides and stitched the gathers in place to squinch it in…and make it look cute at the same time.  I added some vintage trim to cover some of the gathers…and that was that! 

114_7793114_7795114_7797114_7796114_7800114_7809114_7811114_7822114_7820114_7824114_7817114_7825

Perfectly tailored…perhaps not.  But she is thrilled with it (despite the grumpy face!), and it is happily worn throughout many baking adventures!!

Oh…and yes, sometimes completed sewing projects still have lose threads, and sometimes there is paper on my floor!  It’s that kind of creative home over here. 

Saturday, August 21, 2010

China Cabinet Refinish

The sweet little thrifting fairies have been very very good to me lately. Somehow they caught on to the new musings and dreams in the project sector of my brain centered on remaking tired old furniture into something truly amazing. (So easy to make something truly amazing in ones brain isn’t it!) My infection with the itch to get my hands on some great furniture pieces has been largely fueled by this blog that my sister introduced me to. My daughter and I have great fun looking through the project before and afters and I find myself very inspired. I do have to admit that there are times when we prefer the “before”!

The first piece that entered my life (for the dazzling price of … free!) was a dated china cabinet with damage from being stored in a hot humid garage. As with all furniture redo's not all pieces are created equal. In terms of wooden pieces such as this there is little use putting time and effort into remaking a poorly made piece. Particle board…MDF…wibbly wobbly construction…not worth it. Look for solid wood pieces with strong joints. Aside from considering construction and materials the next challenge is to look at the piece for its lines and shapes and forget whatever unpleasing finish is currently on it. This is trick as some finishes are quite distracting in their hideousness…yikes!!

In terms of this cabinet I knew several things right away. I knew it was a well built solid wood piece despite the peeling veneer and and broken hardware. I knew I wanted it as a dresser and not a china cabinet. I knew the lines were good…despite the dated treatments. I knew the glass was more of a canvas than window…the only question was what to put on that canvas. I knew it needed to be mine! 105_7168

I started by getting rid of the molding at the top of the cabinet and removing all the loose veneer. I sanded the entire piece and spray painted. I was very pleased with the quality of finish the spray painting produced. It was my first time spray painting anything. There were serious doubts from the peanut gallery on whether it would turn out well…! Choosing hardware turns out to be just as much fun as choosing buttons. I highly suggest little children for this activity. It is so much fun to see what they love and are drawn to…and all those little handles to try out! Yikes! We do love hardware store trips.

With new paint and hardware the only thing left to do was create some kind of finish on the glass. Because I was planning to use the cabinet as a clothes dresser I wanted some opaqueness to the glass…but not all opaque. After way to much deliberation I decided on a graphic floral design and bold stripes. This was by far the most tedious and time consuming part of the project. But I love it….so it’s easy to forget about the work involved! I covered the glass with contact paper and traced my design onto it. 107_0102

Then…little by little…bit by bit…I cut away the pieces with an exacto knife.107_0101 107_0103

After the pieces that I wanted to be opaque-ish were cut away I used a frosting finish for glass and sprayed several even coats. Then the best part…peeling off the contact paper and revealing the finished design. 109_0004 109_0006

I am sooo happy with how it came out! It’s fresh and modern and just the look I was going for. I love using it and am so excited to finish more pieces.

BEFORE

105_7168

AFTER

109_0006

Monday, August 2, 2010

Dance

I’ve shared with you before how much my little girl loves to dance.  She loves to dance.  All day everyday she dances from room to room, often wearing a tutu, leotard, or dress she deems twirly enough!  It is simply a part of her!  In fact, at this very moment she is dancing and flitting around from room to room in a purple leotard gathering toys.  It’s unlikely she will take it off…or stop dancing…before bedtime! 

Recently I decided I wanted to document more of my children’s loves and current interests with artwork created by me.  This serves two purposes.  It creates a beautiful representation of where they are in this phase of their lives, and also offers me yet another chance to create.  I completed a zebra for my son recently and have only to hang a new piece for my dancing girl! 

105_7161

I used a piece of salvaged wood and stenciled three dancers, and wrote the word “dance”.  I used a staple gun to attach scraps of fabric and “gauzy” bits to create their skirts.  Yup…that’s it!  Easy peasy!  Now the only challenge lies in finding the perfect spot to hang it that also lines up with a wall stud…!  I’m probably being overly cautious…but I don’t want to take any chances with it falling down! 

 105_7155105_7158105_7159105_7165105_7164105_7162

Happy Monday friends!  Granola is in the oven…bread is started…the kidlings are playing beautifully…it’s going to be a great week! 

Saturday, July 31, 2010

Out Kalooping

105_7184

The Main Street Store

Main Street  -  Albion, NY

A few steps from the Erie Canal on the main street of this small farming town is one of my favorite thrifting haunts.  The store funds many of the community action programs of the area.  Literacy and computer classes, unemployment counseling, and many charitable services are provided here.  It makes the thrifting all the more fun to know the money goes to a good cause!  I never fail to fall in love with something here.  Once it was a set of two perfect yellow chairs…which technically weren’t for sale…but one can now be seen here, and the other is not far from it!!  Most recently it was a china cabinet that is currently receiving a facelift…and that I am sooo excited to show you!  There is something special that builds between a girl and her thrifting spots.  It’s a relationship that must be respected and nurtured!  But oh is it worth it! 

105_7201   105_7185 105_7187 105_7194  105_7189 105_7190 105_7198 105_7191  105_7197105_7193  105_7200

Monday, July 19, 2010

How to Make Capris from Jeans With a Gusset…so they fit and look good!

At the beginning of the season I bought a pair of shorts/capris with fantastic little gusset on the inside of the leg that widens them a bit and improves the fit marvelously. They have become my go-to shorts this summer…I love them. I was needing something in between holey, stained painting shorts and wear in public shorts so have been refashioning a few pairs of jeans in the pattern of my favorites! Now I can look cute even while getting dirty dirty dirty working in the garden and playing in the sandbox and rolling down the hill and building fairy houses under trees and…..! Though it was a bit of an experiment the first time around it turns out it’s quite simple. Care to have a go at it!!!

Materials: Jeans! – straighter leg styles work best…no skinny jeans!

Basic sewing paraphernalia

Instructions:

1. Cut your jeans off 1 1/2” – 2” BELOW where you want the hem.
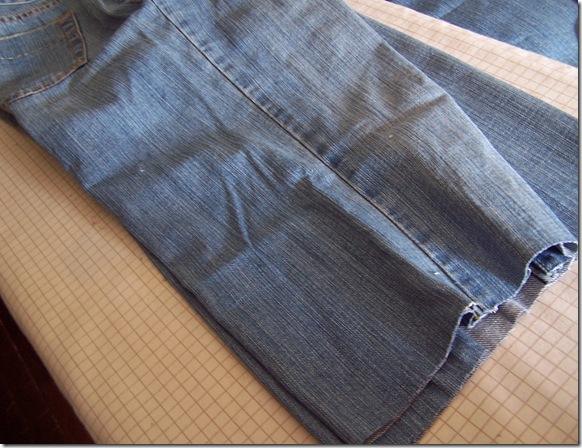
105_6890

2. Save the bottom of the pant leg and cut a panel centering the inner seam.

105_6892105_6893

3. With right side out cut very close, but leaving the top stitching, along the inner seam until approximately 4-5” from the crotch seam.
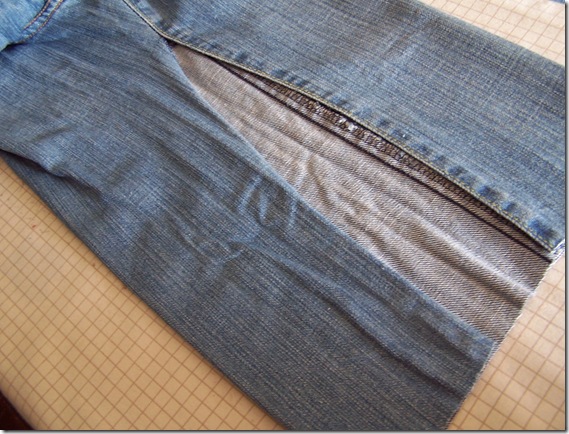
105_6891

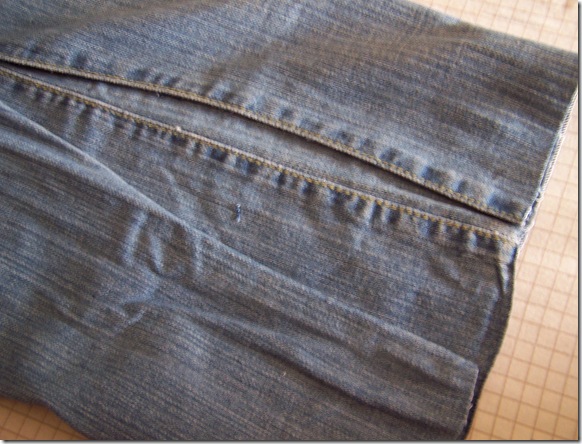
4. Slide the panel inside the pant leg lining up the seams exactly…or your leg will look a bit wonky!
105_6894105_6895

5. Iron the slit edges flat and allow them to find their angle. This step might sound strange but the fabric want to lay flat and was pulled in on the original jeans…you’re just allowing it to do what it wants…aren’t you awesome!

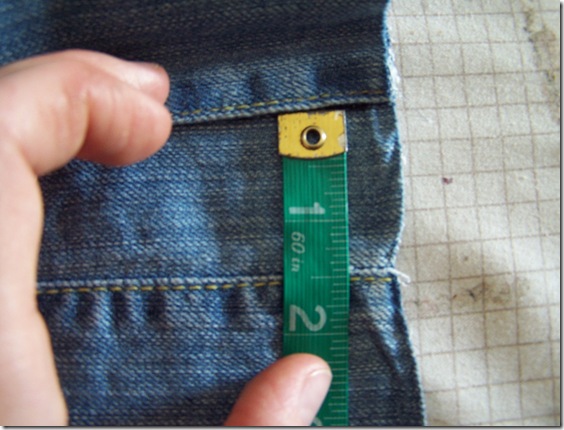
6. Align the bottom of the topstitched edge 1 1/2” from the center seam of the panel. (this is a personal taste thing…you can make your gusset as wide as you like!!) Pin the top stitched edge to the panel being careful not to catch the other side of the pant leg.
105_6899

105_6896

7. Stitch along the top stitching. (I used a bluish grey thread that is basically invisible on the denim so the original top stitching looks…well…original!105_6911105_6897

8. On the panel make a mark 2” from the center seam. (Again…this is a personal taste…whatever size you make your gusset you will want the “back” side to be wider than the front.)

105_6900

9. Pull the panel out of the pants.105_6902

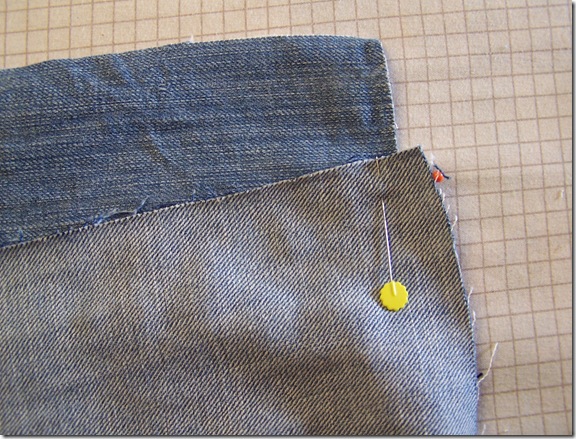
10. At the top of the slit pin the raw edge 1/4” over onto the panel while matching the edge of the bottom to the mark on the panel.

105_6905

11. Place a pin in the mark on the panel. Match the raw edge of the slit 1/4” past the mark on the panel to give yourself a seam allowance. The hem will not match up evenly…this will need to be trimmed later…no big deal! 105_6903105_6904

12. Stitch!

105_6906

13. Trim the panel to leave ~1/4” seam allowance. Finish the edges with a zigzag stitch or with a serger.

105_6907105_6909

14. Trim the hem even.

15. Fold and press the bottom edge over 1/4” then again 1 1/4” from the pressed edge to form the hem. (Also a personal taste thing…make your hem however you like!!!)

105_6912

16. Stitch…wear…enjoy!

105_6913