Printing…on anything, with anything…is one of my new loves. Several Christmas gifts have been made specifically as a canvas for me to print on! It’s very fun…very catching…and very easy to do with children.
I have been potato printing since I was quite little with my own mom, and it is now something that my daughter and I enjoy to do together. Crafting that transcends generations like this just feels so good.
As with any of the cards that I have shared this week, the possibilities for this card are endless! Because printing, is so versatile, I decided to simply share the process, show you some of the cards that we made to spur your imagination, and let your own imaginations lead you anywhere they please! Have fun!

To make the cards shared today you will need:
(Some of these may seem strange…just go with it!)
*Potatoes, carrots, apples
*Cookie cutters that are smaller than the potatoes
*Paint
*Cardstock cut to your desired card size.
How to print using potatoes, carrots, and apples:
Potatoes:
Step 1. Cut potatoes in half.

Step 2. Press a cookie cutter into the potato. Be sure to press it down at least 1/4”. (If you do not have cookie cutters that work, or do not wish to use them, you can create your own shapes with a sharp knife and cut them out using the same method.)


Step 3. This step is tricky…beware!!! Using a sharp knife cut the potato outside the cookie cutter shape away. Cut in small sections being careful not to cut away your printing shape.


Step 4. Cut two notches in the back of the potato to make a handle for chubby little fingers to be able to hold on more easily. This has helped our printing so much!!!

Step 5. Dry the printing surface of your potato off by blotting it on a cloth.

Step 6. Prepare your paint on a wide surface with a rag for blotting.

Step 7. Prepare a row of cards to be printed.

Step 8. Print. Dip the potato into the paint making sure the entire surface is covered :: Blot once on the paint tray :: Blot once on the rag :: Hold down your card with one hand :: Print away!!!
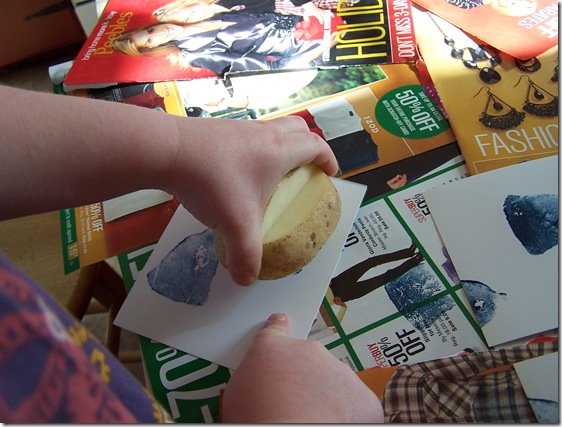

Don’t be afraid to overlap images, let images run off the page, etc.

Carrots:
Step 1. Cut carrots into sections taking care to produce a very flat edge.

Step 2. Set up your paint, cards, and printing area. Print away using the potato printing method.

Apples:
Step 1. Cut the apples in half around the center rather than from top to bottom. As with the carrots, be sure to make a very flat cut to make for easier printing.

Step 2. Blot the printing surfaces of the apples to dry them.

Step 3. Set up your paint, paper, and printing area. Print away!!!

Write a short holiday message on the cards, sit back…and think of what you can print on next! If children are printing on their own, which is wonderful, (yet sometimes produces unbalanced compositions), one short hand written message is all it takes to balance things out and make a truly lovely card!
Our Gallery of Cards!


Happy printing friends!!!


 Posts