Thursday, December 31, 2009

The Castle

105_4475

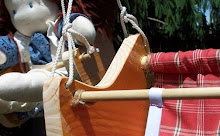
Several months ago while immersing myself in all things Waldorf and Montessori in the blogosphere I discovered this.  I fell instantly (and deeply) in love.  I knew deep down that my children needed a toy like this…and that I needed them to have it…and that (somehow) we would need to make it. 105_4474I realized that it was no ordinary toy to undertake making.  But…in true Hannah style I never stopped to think about whether or not I was capable of making it.  I never stopped to consider if I even knew how to make it…the first step?…the second?…?!!  I brainstormed my vision with my father (he’s my woodworking mentor!!…and tool source!), “created” for days all within my mind…dug through some wood…figured out the first step, and went from there.  I won’t say that there weren’t any moments of total bewilderment of how to proceed, but the process, though long, skill-stretching, and very sawdusty was a joy!  

105_4482

105_4483

And so…over the period of several months a pile of wood salvaged from an orchard took shape and became a childhood treasure…an open-ended toy ready for hours of adventure…a toy to be passed down from momma to son…from son to babe…again and again. 

105_4487

105_4490

As I worked on this project evening after evening discovering Hannah-the-woodworker, I learned something about myself.  Indeed it was something I should have already known…but perhaps I know it a bit better now.  Underneath the many roles that I play each day…I am an artist. It is who I am.  Just as much as I am a mother…a wife…a daughter…!  I am an artist.  It’s about time I started acting like one!!  105_4481    105_4486  105_4489    105_4476 For those of you who would like details (my brothers…!) this first set of the castle includes one front gate (approximately 12” tall and 18” wide), 9 wall pieces (each approximately 6 1/2” tall and 8” wide) two of which have gates…ten soldiers and four horses.  A center tower is in construction, but I’ll admit that it has me beaten at the moment! 

Wednesday, December 23, 2009

Peace. Joy. Noel.

May your holidays be filled with true and lasting joy as you celebrate with loved ones, continue time-honored traditions, start new ones, and create beauty in your surroundings. 

Happy Holidays friends.

**************************************************************

*I’ll be back soon…but this little space of mine will be quiet for a bit as we finish last minute projects, wrap (and wrap and wrap), bake (and eat) all sorts of yummies, and enjoy every last drop of the Holidays…as I am sure you are doing as well.  And oh do I have a treasure trove of projects to share with you when I return!!!

Tuesday, December 22, 2009

Peace

As we reconnected after her sunday school class on Sunday…

“Mom look…I made a necklace for the house!”

105_4351

On another note…we celebrated the beginning of winter and the return of the sun today.  Welcome winter…may you be filled with laughter and peace, with many full and happy (and healthy) days. 

105_4369

Peace.

Monday, December 21, 2009

A Christmas Dress

In the list of things to do in preparation for this Holiday Season that has been floating around in my head for months has been making a Christmas Dress and vest for my littles.  The plan was to use a beautiful red corduroy that I had several yards of, and trim it with simply wonderful trim that was brought back from Germany for them by their Nana and Grandpa.  I wanted them to look like little German storybook characters!  It turns out I don’t have several yards of beautiful red corduroy…and no one can guarantee that I ever did!!! What am I going to do with this head of mine?!?!

So plan B:  I found a simply gorgeous vintage dress in incredible fabric and perfect condition, tore it apart and made a dress and tie!  There are some mistakes…but we just love them (not the mistake…the outfits!!).  So unique.  So party-ready.  So perfect for dancing.  Sooo cute!!!

 105_4222

We worked hard to get a good picture of the two of them…it took 3 adults…lots of grapes…the ornaments from high up on the tree that are not for touching…and a whole lot of silliness. 

Here are a few of the outtakes!!! 

105_4267-1105_4284

105_4318105_4304

Ahh…Christmas! 

105_4298105_4301

105_4313105_4314

105_4315

Saturday, December 19, 2009

Waddle

We have a little elf that is very involved in the secret “making” that precedes Christmas. She has a secret for Nana tucked away in her kitchen set fridge where she is sure no one will ever see it. She has a secret for her little brother tucked away between the hugest books she could find in the book shelf. She has a secret for Daddy tucked (and crumpled) in the bottom of the sewing basket (that has now taken up residence outside of the sewing room and on the dining room table to be exact!, so Momma can catch a minute to sew, pin, and tuck throughout the day!). She has some kind of secret creative messes cooked up with Daddy too…and tucked who-knows-where. This many secrets is too much to place on one little four-year-old. She is bursting! Truth be told she has burst a little already! It is delightful to watch her so completely full of the true excitements of the holidays.

105_4217

This morning I came to the realization that although shown in different ways, I am just about as close to bursting with secret creations also. So many of my projects have been (long) labors of love and I am so excited about them these last few days seem too long to wait!!! I need to tell someone! I think I’ll call my sister!! Yes…the secret makings are indeed one of the sweetest joys of the holidays.

As promised, here’s a glimpse into our holiday makings.

My daughter found this duck cookie cutter recently in the kitchen and it immediately became a friend. It was named Waddle, and for several days went everywhere with her. She made up marvelous stories for it and they had wonderful adventures. She was telling me all about “Waddle”…and her Christmas gift for her little brother was born. 105_4219

105_4050

105_4051She did a great deal of the sewing, and ironing (with the real iron…yikes), painting, and writing. It was a fabulous to work on together.

105_4212

105_4215

Waddle

By. Rebecca

This is Waddle.

Waddle likes to do everything Spencer likes to do.

Spencer likes to play in the sandbox. So does Waddle.

Spencer likes to take walks to the stream. So does Waddle.

Spencer likes blocks. So does Waddle.

Waddle has wonderful wonderful parents. He stays with them all the time. So does Spencer.

The End.

Friday, December 18, 2009

Reverse Appliqué Table Topper

The Holidays are busy…there’s no doubt about that!  But I love it.  It’s a wonderful busy…filled to the brim with fabric and pins, wood and sandpaper, projects and secrets, family and friends.  Yes, it is a very happy busy indeed.  My parents remember with joy this time of year when my siblings and I were still young, when dinner was never served at the dining room table, when hand written “Stay Out” signs were taped to boxes and doors throughout the house, when certain siblings were forbidden to enter the sewing room or workshop, when secret bits of handmade love were positively bursting out of the nooks and crannies of the house.  

Not much has changed!  There are secrets and surprises tucked in each nook and cranny of my own family’s holiday days.  Mysterious packages arrive and are whisked away to unknown places.  Little ones are taken away for some one-on-one creating time for others.  It is indeed a busy busy joyful time of year. 

I have wanted to share with you many of the projects that I am working on right now but know that many of my siblings join me in this space regularly…and no “Stay Out” sign works on a blog!!!  Glimpses perhaps!  Yes…we’ll share glimpses.

The Reverse Appliqué Table Topper however is gift to my Oma.  She is wonderfully German, lived through WWII, immigrated to the United States with my father when he was a boy, attained US citizen ship, survived and conquered innumerable trials and obstacles and firmly acquired the title of a “woman-who-can-do-anything”…..yet does not have (or ever use) a computer!!  So I’m safe to share more than a glimpse!!

105_4205

Many fabric choices will produce beautiful results for this project.  I chose to dip into a delicious pile of wool scraps that is tucked  away on my fabric shelves.  I felted the wool lightly before working with it by washing and drying it in the machine once.

How to Make a Reverse Appliqué Table Topper

Step 1.  Determine the size of your table topper.  Cut four layers of wool in coordinating colors a bit larger than your desired size. Decide the layering order of your pieces.

105_4190

Step 2.   Draw a design on a piece of paper the same size as your wool pieces. 

105_4192

Step 3.   Cut out the design pattern and pin to the piece of wool the you would like to be on top.

Step 4.   Cut around the pattern pieces.  My design was a bit narrower than I was comfortable with so I adjusted it by cutting ~1/4” outside my pattern.

105_4196

Step 5.  Pin the top layer to the second layer.

Step 6.   Cut the design from the second layer just inside the first layer so the second is showing slightly.

Step 7.  Pin the first two layers on top of the remaining two layers.  Stitch around the design with a running stitch.

105_4202

Step 8.  Trim the edges of the table topper.  Stitch around the border with a simple running stitch.

Step 9.  Arrange on the table and enjoy!!!

105_4205


Thursday, December 17, 2009

A Twist on an Old Robinson Tradition

105_4171

I have had many questions about how I fit so much creating into my days.  While priorities are a huge part of that answer there is another secret weapon that I hold to be the real reason so much messy, wonderful, creating happens around here.  He’s tall and strong and oh-so-handsome…but most importantly he gets it.  He gets why it is so critical to a healthy Hannah that I create everyday…he gets how much our children learn from doing (albeit messily doing) along side…he gets that dinner on time on the dining room table is not always necessary, but the glorious messy creativity happening on the dining room table is…he just gets it!!! 

Although he is marvelously talented in his own ways he is not always the center of our creative endeavors.  Not always…but this day I came into the dining room and found him surrounded by little hands, glue, tape, crayons, markers, and positively up to his elbows in a creative mess!!!  It was beautiful!!! 105_4183His family makes a paper chain to count the days to Christmas each year.  As a spin off of this he allowed little hands to write the numbers (in permanent marker…eeek!) and the littlest hands to decorate the papers.  He cut them apart with kid-sized scissors (!) and they put it all together!!  Oh…he gets it!!! 

105_4184

Wednesday, December 16, 2009

Wreaths!

I remember walking through the mountain woods in my childhood home with a plastic sled and bushel basket gathering bits of beautiful nature for wreath making with my family.  These first unspoken lessons were so poignant and long lasting for me.  It opened my eyes to the natural beauty around us, and raised those beauties to levels untouched by any manufactured items. 

105_4181

As we gathered materials to make wreaths, swags, and baskets of beauty this year in our not-so-mountainous woods those lessons were passed down to another generation. We snipped, pruned, and gleaned beauty.  It is a wonderful and timeless tradition.

For our family the Holiday season centers around the reverent worship and celebration of Christ.  In our home we focus our decorations on the wonders and beauties of the earth.  Focusing on one helps us to focus on the other.  105_4176

Wrapped in a tarp, a bounty of snips and bits found its way onto the porch and we spent a glorious few hours gathering, tying, bunching, filling, and wrapping, creating wreaths, swags, and baskets.  It is one of my most favorite preparations for the Holidays. 

105_4175

 105_4179

Tuesday, December 15, 2009

Rhythm of the Home Giveaway!

Have you checked out Rhythm of the Home yet?!?!  There’s a bit of A Handmade Childhood’s goodness featured there as well as dozens of other articles and projects to drool over and be inspired by!

Rhythm of the Home recently launched their blog and are hosting a giveaway with several wonderful prizes.  Most definitely worth checking out!!!

Button Bliss

Thank you Maribeth for a bit of button bliss!!!

105_3904

Maribeth was my button swap partner. Don’t you love the color scheme of her little package!!   Those blues and oranges are just calling to me!  The little zipper pouch is being pulled in so many directions as I figure just what purpose it is perfect for.  Isn’t that a delightful challenge!!!  Ahh…and those buttons.  What bits of loveliness will I place you on?!?!

Monday, December 14, 2009

How to Make a Paper Mache Pumpkin Bowl

This post is long overdue…but I thought I would share the project anyway. 

Several years ago my daughter and I made a paper mache bowl using a glass bowl for a mold.  We painted it a lovely blue and stamped her hand…using her hand…all over it and gave it as a gift to her grandparents.  It is a constant decoration at their house!

It was a lot of fun and gave me the idea to make a pumpkin bowl using the same process.  The goal was to increase our seasonal decorations!  The result was many days of messy fun and a delightful finished product.  Everyone is happy!

How to Make a Paper Mache Pumpkin Bowl

1.   Choose a pumpkin with a base shape that you like.  Scrub it clean and dry it thoroughly

Fall 244

2.   Cover the bottom half of the pumpkin with saran wrap.

Fall 247

3.  Prepare newspapers by ripping strips ~1” wide.  Newspaper rips very easily one way and not so easily the other way.  Rip from fold down!

It is wise to have an extra bowl of strips!!! Fall 251

4.   Prepare the paper mache mix by finding a happy ratio of water and flour.  I like the consistancy of egg nog.  Too thin isn’t effective…and too thick is lumpy and disgusting and really doesn’t look nice!! Fall 249 

5.  One by one coat the strips with paper mache and layer onto the pumpkin.  This is deliciously messy…you’ll want lots of newspaper or oilcloth underneath and aprons!!

Fall 248

6.  Layer the strips until you have the bowl shape that you’d like.  Keep the layer quite thin as you need some flexibility to get the bowl off the pumpkin.  ~2-3 layers of strips.  Thinner layers also dry much more quickly.

Fall 250

7.   Let the bowl dry and pull it off the pumpkin carefully.  Trim the top edge with scissors. Apply more layers until the bowl is stiff.

8.   Paint!

Fall 674

9.  Decorate or embellish as desired.  My little artist chose to use a carrot as a stamp and made some designs that way.

Fall 750 Fall 756

10.  Let the paint dry thoroughly and apply 1-2 coats of non-toxic varnish.  Find some delightful bits of nature, some yummy treats, or anything you like…fill your bowl and show it off!!!

105_3908